
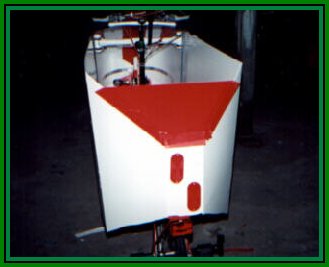
I like to have a tailbox on my bent. I'm always using the one on the Maxxam. I built a tailbox into the fairing. I cut out a trapezoid shaped piece that would sit on my bike's rack and extend to the sides and back of the fairing. This piece is cut about an inch larger all the way around. On the bottom of the piece make cuts halfway through the coraplast on lines corresponding to where the flairing will actually fit on the piece. Then bend up these tabs. Place stick on Velcro on the tab. Position the piece in-place put the other half of the Velcro strip onto the tab's Velcro so they are locked together. Then push the tab against the side of the fairing. The second piece is now glued in its perfect position.
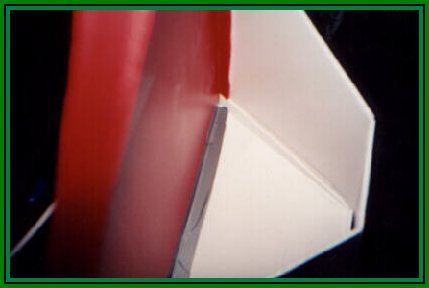
The back of the tailbox and its lid are one piece. It takes some complicated cutting to get it in-place. First you need to determine how far back the lid can come without interfering with the riders back. Just position a piece of coraplast across the back opening and secure it with duct tape. Get on the bike and see if you hit the coraplast. Move it the back and forth until you get right. Make a small mark on the fairing to show where the lid should be. Measured across the fairing to determine the width of the back of the tailbox work comes out of the flairing. Measure from the bottom piece of the tailbox at its forward most edge to the piece of coraplast marking the position where the lid should start. This is the depth of the back.
Cut out a piece of coraplast at least two inches wider than the bottom width of the tailbox. If the measurement of the width for the back of the tailbox is wider at the top then make the piece two inches larger than top measurement. The piece should be long enough to go from the tailbox, to the top of fairing, and at least three inches past the back edge of the fairing. Using your measurements drop the lines on your piece so the actual piece is in the center and there are tabs on each side of the back so they can be Velcro in-place. The top is easier. You make a cut along the line so the piece just lays down alone the top of the fairing. You just mark alone the outside edge of the fairing on the piece. You then transfer the lines to the other side so when you make your cut alongthe tabs will bend down. Trim the tabs so they make a nice joint and tape it. Put Velcro in the center of the back tab to hold the lid down and you're done.
Yes, you can email me with any questions. Also, I'll try to improve the instructions for the tailbox. Although slightly complicated this tailbox is totally removable. The two Tees on the back piece of PVC and the joints on the front frame attachments are held in-place via piece of wire that passes through the joint and the pipe. Just take a drill with a small bit and make a hole through both sides of the joint and pipe. Just read the wire through the holes in bend it so can't fallout. You can use paper clips or if you don't have paper clips steal one of your wife's hangers and cut it up. The entire fairing can be removed in less than five minutes.
![]()
![]()
![]()